摘要:在本教程中,您将学习如何使用 React Navigation 库在 React Native 应用程序中的不同屏幕之间进行导航。
React Navigation 简介
要管理和在 React Native 应用程序中的不同屏幕之间导航,您可以使用 React Navigation 库。
React Navigation 库具有以下主要功能
- 堆栈导航像堆栈一样管理屏幕,允许您在屏幕之间向前和向后导航。
- 底部标签导航在屏幕底部显示一个栏。该栏包括带有图标和标签的项目。当您触摸每个标签栏项目时,标签导航将在屏幕之间进行导航。
- 抽屉导航显示一个侧边栏(或抽屉菜单),您可以滑动和切换它以显示菜单项。
在 React Native 应用程序中,您可以结合使用不同的导航来创建灵活的导航选项。在本教程中,我们将重点介绍构建堆栈导航。
使用 React Navigation 创建 React Native 应用程序
在本节中,您将探索如何在应用程序中设置和使用堆栈导航。
要求
在开始之前,请确保您拥有以下内容
react-native>= 0.63.0expo>= 41(如果您使用 Expo Go)
设置新项目
首先,打开您的终端并执行以下命令以创建一个新的 React Native 应用程序
npx create-expo-app nav --template blank此命令创建 nav 目录并初始化 React Native 应用程序。完成此操作需要一些时间。
其次,导航到项目目录 nav
cd nav第三,执行以下命令以安装 React Navigation 库
npm install @react-navigation/native @react-navigation/native-stackCode language: CSS (css)React Navigation 的基本概念
导航器
导航器是一个组件,它允许您管理导航状态和屏幕。React Navigation 包括以下导航器
StackNavigator– 用于管理堆栈导航。TabNavigator– 用于管理底部标签导航。DrawerNavigator– 用于创建抽屉。
屏幕
屏幕是一个 React Native 组件,它代表导航器中的一个屏幕。导航器将每个屏幕与一个路由关联起来。
路由
路由是一个对象,它定义了屏幕的路径和参数。
导航道具
navigation 道具在堆栈导航中的每个屏幕组件中都可用。它允许您访问导航方法,如 navigate、goBack、push、pop 等。
参数
参数是您从一个屏幕传递到另一个屏幕的参数。
例如,您可以从首页传递包含 id 和 name 的对象到个人资料页面。在个人资料页面,您可以读取参数以进行进一步处理。
创建原生堆栈导航器
步骤 1. 在项目目录中创建一个名为 screens 的新目录来存储屏幕。每个屏幕都是一个 React Native 组件。
步骤 2. 在 screens 目录中创建一个 Home 屏幕
import { SafeAreaView, StyleSheet, Text, View } from 'react-native';

const Home = () => {
    return (
        <SafeAreaView style={styles.container}>
            <View style={styles.screen}>
                <Text>Home Screen</Text>
            </View>
        </SafeAreaView>
    );
}

const styles = StyleSheet.create({
    container: {
        flex: 1,
    },
    screen: {
        flex: 1,
        justifyContent: 'center',
        alignItems: 'center',
    }
});

export default Home;Code language: JavaScript (javascript)
步骤 3. 在 screens 目录中创建一个 Profile 屏幕
import { SafeAreaView, StyleSheet, Text, View } from 'react-native';

const Profile = () => {
    return (
        <SafeAreaView style={styles.container}>
            <View style={styles.screen}>
                <Text>Profile Screen</Text>
            </View>
        </SafeAreaView>
    );
}

const styles = StyleSheet.create({
    container: {
        flex: 1,
    },
    screen: {
        flex: 1,
        justifyContent: 'center',
        alignItems: 'center',
    }
});

export default Profile;Code language: JavaScript (javascript)
步骤 4. 在 screens 目录中创建一个 index.js,导入 Home 和 Profile 屏幕,并立即导出它们
import Home from './Home.jsx';
import Profile from './Profile.jsx';

export { Home, Profile }Code language: JavaScript (javascript)
通过这样做,您可以使用单个导入从 screens 目录导入所有屏幕
import { Home, Profile} from './screens/index';Code language: JavaScript (javascript)而且您不必像这样单独导入屏幕
import Home from './screens/Home';
import Profile from './screens/Profile';Code language: JavaScript (javascript)
步骤 5. 将 Home 和 Profile 屏幕导入 App.js 文件并将 Home 屏幕作为主要组件放置
import { Home, Profile } from './screens/index';

export default function App() {
  return (
    <Home />
  );
}Code language: JavaScript (javascript)
步骤 6. 打开终端并运行应用程序
npm start步骤 7. 修改 App.js 以创建一个原生堆栈导航器
import { NavigationContainer } from '@react-navigation/native';
import { createNativeStackNavigator } from '@react-navigation/native-stack';
import { Home, Profile } from './screens/index';

const Stack = createNativeStackNavigator();

export default function App() {
  return (
    <NavigationContainer>
      <Stack.Navigator>
        <Stack.Screen name="Home" component={Home} />
        <Stack.Screen name="Profile" component={Profile} />
      </Stack.Navigator>
    </NavigationContainer>
  );
}Code language: JavaScript (javascript)
它是如何工作的。
首先,从 React Navigation 库导入 NavigationContainer 和 createNativeStackNavigator
import { NavigationContainer } from '@react-navigation/native';
import { createNativeStackNavigator } from '@react-navigation/native-stack';Code language: JavaScript (javascript)
其次,通过调用 createNativeStackNavigator 函数来创建一个堆栈导航器
const Stack = createNativeStackNavigator();Code language: JavaScript (javascript)注意,变量名不必是 Stack。
createNativeStackNavigator() 函数返回一个对象 (Stack),它有两个属性,两者都是用于配置导航器的 React 组件
屏幕导航器
第三,使用 NavigationContainer 组件作为应用程序的根组件
<NavigationContainer>
   <Stack.Navigator initialRouteName="Home">
     <Stack.Screen name="Home" component={Home} />
     <Stack.Screen name="Profile" component={Profile} />
    </Stack.Navigator>
</NavigationContainer>
Code language: HTML, XML (xml)
Screen 组件包含 name 和 component 道具
name道具指定用于导航的路由名称。component道具定义要渲染的 React Native 组件或屏幕。
堆栈导航器有两个路由 Home 和 Profile。初始路由是显示 Home 屏幕的 Home 路由。
如果您将 initialRouteName 更改为 Profile,您将看到 Profile 屏幕显示而不是 Home 屏幕。
在屏幕之间移动
步骤 1. 修改 Home 屏幕以包含一个按钮以导航到 Profile 屏幕
import { SafeAreaView, StyleSheet, Text, View, Pressable } from 'react-native';
import React from 'react';

const Home = ({ navigation }) => {
    const handlePress = () => {
        navigation.navigate('Profile');
    }
    return (
        <SafeAreaView style={styles.container}>
            <View style={styles.screen}>
                <Text>Home Screen</Text>
                <Pressable onPress={handlePress} style={styles.button}>
                    <Text style={styles.buttonText}>Go to the Profile screen</Text>
                </Pressable>
            </View>
        </SafeAreaView>
    );
}

const styles = StyleSheet.create({
    container: {
        flex: 1,
    },
    screen: {
        flex: 1,
        justifyContent: 'center',
        alignItems: 'center',
    },
    button: {
        backgroundColor: '#FFD966',
        paddingHorizontal: 20,
        paddingVertical: 10,
        borderRadius: 99,
        alignItems: 'center',
        marginVertical: 10,

    },
    buttonText: {
        color: '#4B4942',
        fontSize: 16,
    },
});

export default Home;Code language: JavaScript (javascript)
当您按下按钮时,您将导航到 Profile 屏幕。如果您点击标题上的后退按钮,您将返回到 Home 屏幕。
它是如何工作的。
首先,将 navigation 道具包含在 Home 组件中。请注意,包含在导航堆栈中的所有屏幕都将自动具有 navigation 道具
const Home = ({ navigation }) => {Code language: JavaScript (javascript)其次,通过使用 Profile 路由名称调用 navigation 对象的 navigate() 方法,在 handlePress 回调中导航到 Profile 屏幕
const handlePress = () => {
   navigation.navigate('Profile');
}Code language: JavaScript (javascript)
如果您想从 Profile 屏幕以编程方式返回到 Home 屏幕,您可以使用 navigation 对象的 goBack() 方法。
步骤 2. 修改 Profile 屏幕以包含一个按钮,当按下时,返回到 Home 屏幕
import { SafeAreaView, StyleSheet, Text, View, Pressable } from 'react-native';

const Profile = ({ navigation }) => {
    const handlePress = () => {
        navigation.goBack();
    }

    return (
        <SafeAreaView style={styles.container}>
            <View style={styles.screen}>
                <Text>Profile Screen</Text>

                <Pressable onPress={handlePress} style={styles.button}>
                    <Text style={styles.buttonText}>Go back to the Home screen</Text>
                </Pressable>
            </View>
        </SafeAreaView>
    );
}

const styles = StyleSheet.create({
    container: {
        flex: 1,
    },
    screen: {
        flex: 1,
        justifyContent: 'center',
        alignItems: 'center',
    },
    button: {
        backgroundColor: '#FFD966',
        paddingHorizontal: 20,
        paddingVertical: 10,
        borderRadius: 99,
        alignItems: 'center',
        marginVertical: 10,

    },
    buttonText: {
        color: '#4B4942',
        fontSize: 16,
    },
});

export default Profile;Code language: JavaScript (javascript)
在屏幕之间传递数据
要传递数据在屏幕之间,请按照以下步骤操作
首先,将对象作为 navigation.navigate() 方法的第二个参数传递
navigation.navigate(routeName, {
   id: 1,
   name: 'John Doe'
});Code language: CSS (css)
其次,使用 route.params 对象在另一个屏幕上读取数据
const data = route.params;Code language: JavaScript (javascript)与 navigation 道具一样,route 是组件的道具,例如
const Profile = ({ navigation, route }) => {
}Code language: JavaScript (javascript)您也可以解构 route.params 对象中的数据
const {id, message} = route.params;Code language: JavaScript (javascript)以下示例展示了如何将数据从 Home 传递到 Profile 屏幕
步骤 1. 修改 handlePress 函数以将对象作为 navigation.navigate() 方法的第二个参数传递
const handlePress = () => {
    navigation.navigate('Profile', {
          id: 1,
          name: 'John Doe',
    });
}Code language: JavaScript (javascript)
步骤 2. 修改 Profile 屏幕以读取从 Home 屏幕传递的数据
import { SafeAreaView, StyleSheet, Text, View, Pressable } from 'react-native';

const Profile = ({ navigation, route }) => {
    const { id, name } = route.params;
    const handlePress = () => {
        navigation.goBack();
    }

    return (
        <SafeAreaView style={styles.container}>
            <View style={styles.screen}>
                <Text>id: {id}</Text>
                <Text>name: {name}</Text>
                <Pressable onPress={handlePress} style={styles.button}>
                    <Text style={styles.buttonText}>Go back to the Home screen</Text>
                </Pressable>
            </View>
        </SafeAreaView>
    );
}

const styles = StyleSheet.create({
    container: {
        flex: 1,
    },
    screen: {
        flex: 1,
        justifyContent: 'center',
        alignItems: 'center',
    },
    button: {
        backgroundColor: '#FFD966',
        paddingHorizontal: 20,
        paddingVertical: 10,
        borderRadius: 99,
        alignItems: 'center',
        marginVertical: 10,

    },
    buttonText: {
        color: '#4B4942',
        fontSize: 16,
    },
});

export default Profile;Code language: JavaScript (javascript)
它是如何工作的。
首先,从 route.params 对象中解构 id 和 name
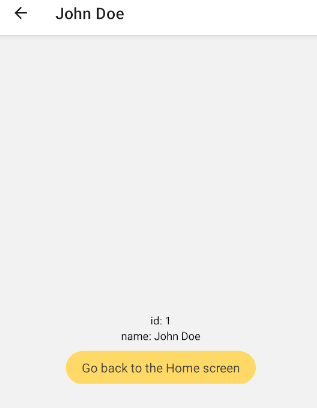
const { id, name } = route.params;Code language: JavaScript (javascript)其次,在屏幕上显示 id 和 name
<Text>id: {id}</Text>
<Text>name: {name}</Text>Code language: JavaScript (javascript)
自定义屏幕标题
更改标题
Screen 组件有一个 options 道具,它接受一个对象或一个函数,该函数返回一个用于配置屏幕标题的对象。
例如,您可以将 Home 屏幕的 Home 标题更改为 Welcome,如下所示
<Stack.Screen
name="Home"
component={Home}
options={{ title: 'Welcome' }}
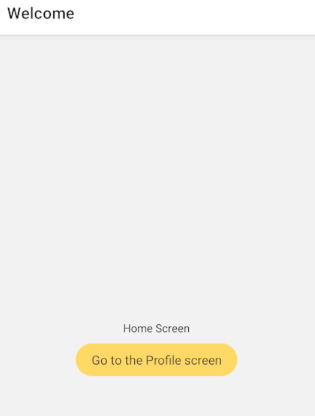
/>Code language: JavaScript (javascript)在此示例中,我们将 Home 屏幕的 options 道具设置为一个对象,该对象包含 title 'Welcome'。Home 屏幕在 Android 上应该看起来像下图
要使用 params 作为标题,您需要将函数传递给 options 道具并通过 route 访问 params。
例如,以下说明了如何使用 name 参数作为 Profile 屏幕的标题
<Stack.Screen
  name="Profile"
  component={Profile}
  options={({ route }) => ({ title: route.params.name })}
/>Code language: JavaScript (javascript)在此示例中,我们将一个箭头函数传递给 options 道具。该函数访问 route 道具并将标题设置为 name 参数
此外,您还可以通过调用 navigation 对象的 setOptions 方法来更新活动屏幕的 options
navigation.setOptions({title: 'John Doe Profile'})Code language: JavaScript (javascript)自定义标题样式
除了动态更改标题之外,您还可以通过以下属性自定义屏幕标题的样式
headerStyle属性定义应用于包装标题的 View 的样式。例如,您可以为标题设置背景颜色。headerTintColor属性定义后退按钮和标题的颜色。headerTitleStyle属性定义标题的样式,如fontFamily、fontWeight和其他Text 样式。
以下示例更改了 Home 屏幕的标题样式
<Stack.Screen
  name="Home"
  component={Home}
  options={{
    title: 'Welcome',
    headerStyle: {
      backgroundColor: '#FFD966',
    },
    headerTintColor: '#4B4942',
    headerTitleStyle: {
      fontWeight: 'bold',
    },
  }}
/>Code language: JavaScript (javascript)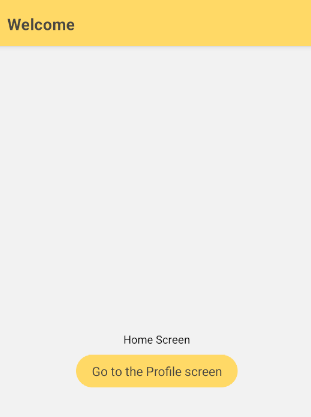
要共享跨屏幕的相同标题样式,您可以将配置移到 screenOptions 道具下的原生堆栈导航器
<Stack.Navigator
  initialRouteName="Home"
  screenOptions={{
    headerStyle: {
      backgroundColor: '#FFD966',
    },
    headerTintColor: '#4B4942',
    headerTitleStyle: {
      fontWeight: 'bold',
    }
  }}>
{/* ... */}
</Stack.Navigator>    Code language: JavaScript (javascript)
现在,所有屏幕(包括 Home 和 Profile 屏幕)共享相同的标题样式
用自定义组件替换标题
React Navigation 允许您用自定义组件替换标题。例如。
步骤 1. 创建一个名为 components 的新目录来存储 React 组件。
步骤 2. 在 components 目录中创建一个名为 ProfileHeaderTitle 的新组件
import { StyleSheet, Text, View } from 'react-native';
import Feather from 'react-native-vector-icons/Feather';

const ProfileHeaderTitle = ({ name }) => {
    return (
        <View style={styles.container}>
            <Feather name="user" size={24} color="#4B4942" />
            <Text style={styles.title}>{name}</Text>
        </View>
    )
}

const styles = StyleSheet.create({
    container: {
        flexDirection: 'row',
        alignItems: 'center',
        justifyContent: 'space-between',
        gap: 10
    },
    title: {
        fontSize: 16,
        fontWeight: 'bold',
        color: '#4B4942'
    },

});

export default ProfileHeaderTitle;Code language: JavaScript (javascript)
步骤 3. 修改 App.js 以使用 ProfileHeaderTitle 组件作为 Profile 屏幕的标题
import { NavigationContainer } from '@react-navigation/native';
import { createNativeStackNavigator } from '@react-navigation/native-stack';
import { Home, Profile } from './screens/index';
import ProfileHeaderTitle from './components/ProfileHeaderTitle';

const Stack = createNativeStackNavigator();

export default function App() {

  return (
    <NavigationContainer>
      <Stack.Navigator
        initialRouteName="Home"
        screenOptions={{
          headerStyle: {
            backgroundColor: '#FFD966',
          },
          headerTintColor: '#4B4942',
          headerTitleStyle: {
            fontWeight: 'bold',
          }
        }}>
        <Stack.Screen
          name="Home"
          component={Home}
          options={{
            title: 'Welcome'
          }}
        />
        <Stack.Screen
          name="Profile"
          component={Profile}
          options={({ route }) => ({
            headerTitle: () => <ProfileHeaderTitle name={route.params.name} />,
          })}
        />
      </Stack.Navigator>
    </NavigationContainer>
  );
}Code language: JavaScript (javascript)
总结
- 使用 React Navigation 库来管理和在屏幕之间进行导航。